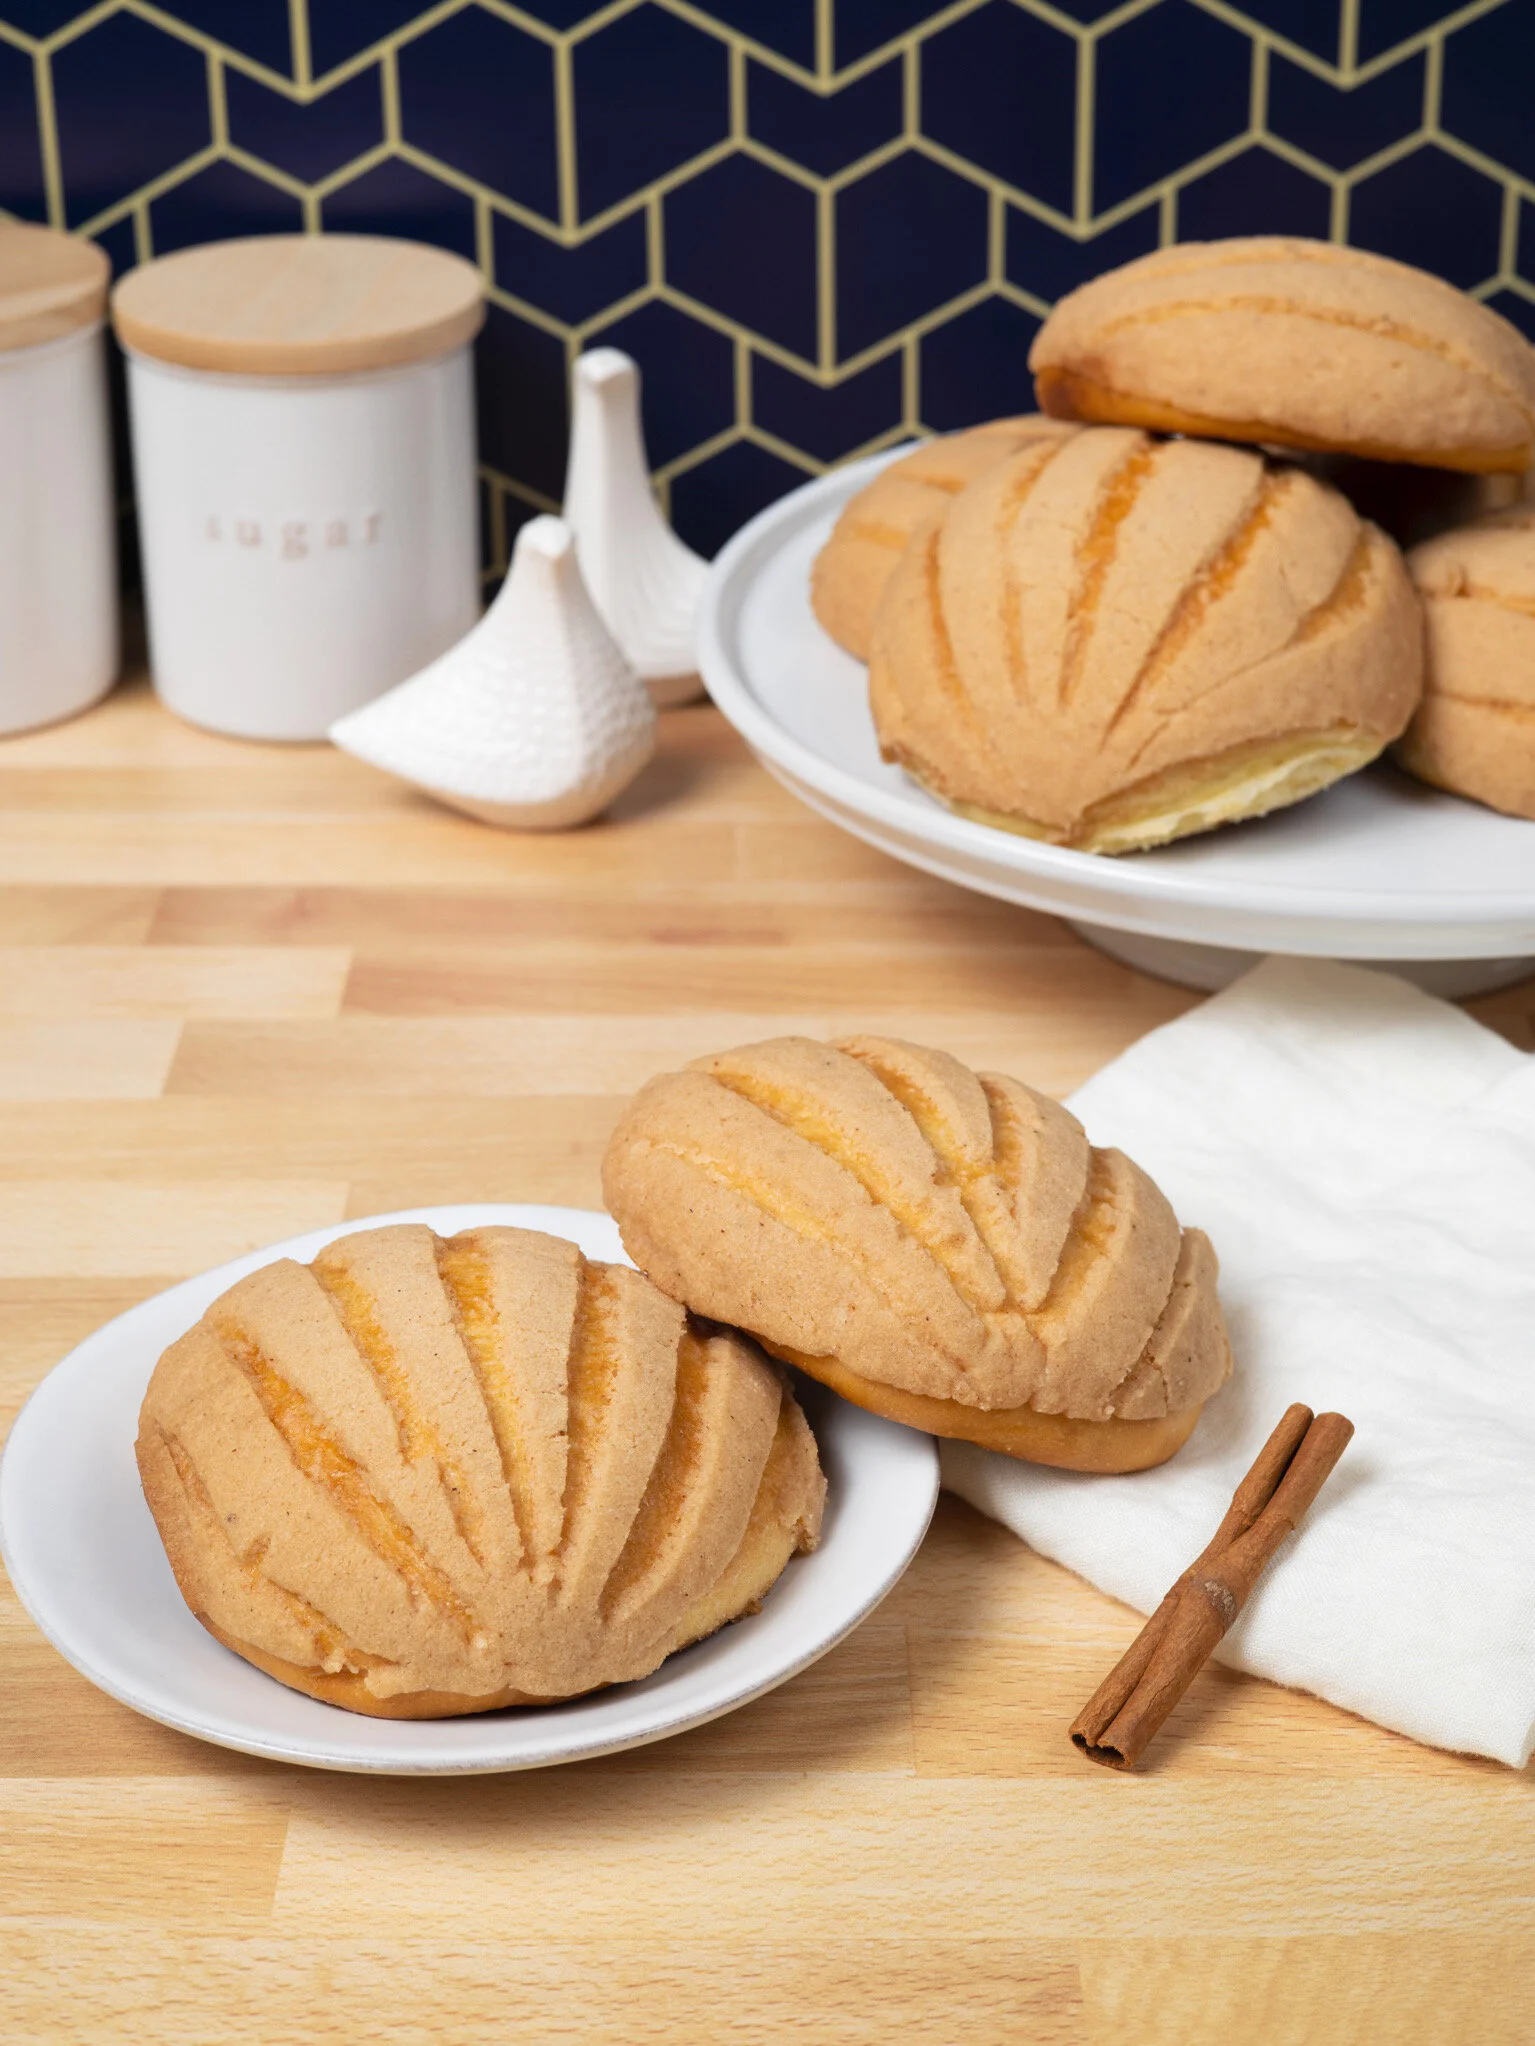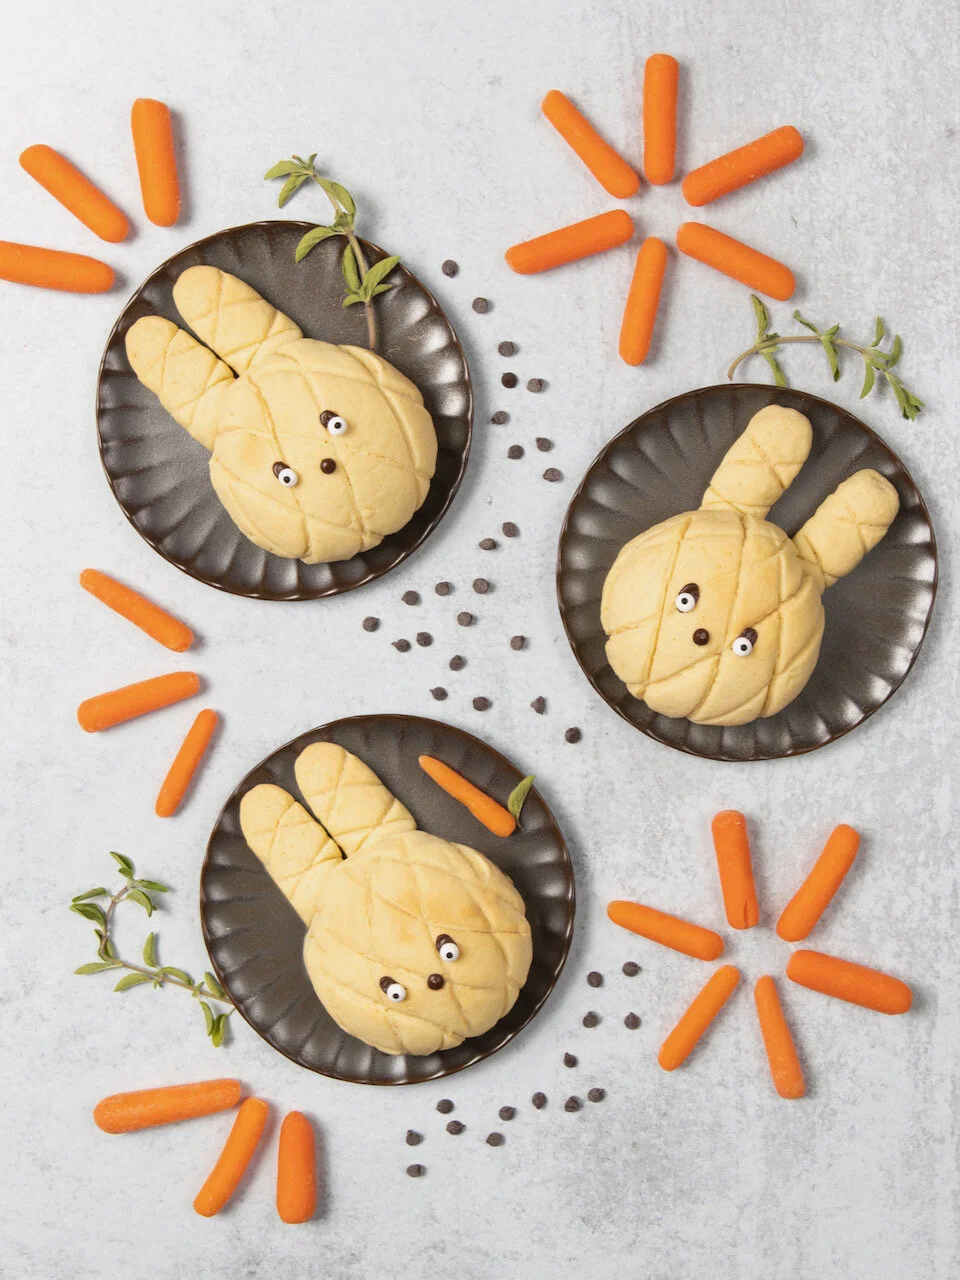
Bunny Pineapple Buns
Even though they're from different parts of the world and different cultures, Melon Pan, Conchas, and Pineapple Buns (Bolo Bao) are all very similar. Soft and fluffy, sweet buns with a cookie-like topping. These little guys are stuffed with chocolate chips –not carrots ;) – and reminded me a little of biting into a pain au chocolat. I suppose I should also mention that there’s no pineapple in the recipe, the name comes from the decorative pattern on top.
These Bunny Pineapple Buns are modeled after Yukiko Tanzi's adorable Bunny Melon Pan that can be found on her Foodie Yuki Blog. I absolutely recommend trying out her recipe out first, especially if you have all of the ingredients she lists and especially if you’re vegan. Truth be told, I did try Tanzi's recipe for my first go at these. I couldn't find the yam powder for the topping, so I tried using potato flour instead as suggested. Unfortunately, it must not be an ideal substitute, because it doesn't have the same sweet flavor or color, and sadly the topping ended up gray and tasted like flour. I'm sure it's delicious if you use the yam powder. In any case, I wasn't ready to give up on this clever concept, so I decided to make a Pineapple Bun topping since I absolutely loved them when I made them last year from a Bake from Scratch recipe. The egg yolk in the recipe gives them that yellow hue which is perfect for spring!
The buns from Tanzi's recipe were incredibly delicious, so the bun recipe below is essentially a non-vegan version of her recipe with some added cinnamon and nutmeg to compliment the chocolaty center.

I couldn’t resist adding googly eyes! Photos by Daniel Marks

Bunny Pineapple Buns Recipe:
Yield:
6 Buns
Difficulty:
Moderate
Ingredients:
For the Topping:
57 grams (¼ cup) unsalted butter, softened
50 grams ¼ cup granulated sugar
¼ tsp fine salt
1 large egg yolk
1 TBSP half & half or whole milk
¼ tsp vanilla extract
125 grams cake flour
2 TBSP dry milk powder (either nonfat or whole will work, I've tried with both)
For the Buns:
220 grams bread flour
20 grams light brown sugar
½ tsp fine salt
¼ tsp cinnamon
⅛ tsp nutmeg (optional)
1 tsp instant yeast
30 grams unsalted butter, cubed and softened to room temperature
140 ml whole milk, warmed to 80°F - 100°F
For Assembly:
⅓ cup mini semi-sweet chocolate chips
Instructions:
Make the topping:
Beat butter, sugar, and salt together on medium speed of a stand mixer with the paddle attachment. 2-3 minutes until creamy.
Add the yolk, milk, and vanilla and continue to beat until well combined.
In a separate bowl, whisk the cake flour and milk powder together then add to the mixer and beat on low until just combined and a dough forms. Turn out onto a sheet of plastic wrap and shape into a log. Tightly wrap and refrigerate while you make the dough.
Make the buns:
Whisk together the bread flour, sugar, salt, cinnamon, nutmeg, and instant yeast in the bowl of a stand mixer.
Add warm milk and butter then knead with the dough hook attachment until soft and elastic (10-15 minutes). Do the windowpane test. If the dough is not ready, continue to knead for another minute and check again. When the dough is ready, lightly grease the dough, turning to coat. Cover the bowl with a damp towel or plastic and let rise in a warm place until doubled in size, 1-1½ hours.
To assemble:
This is Tanzi's method and it may be helpful to watch the video below from her instagram feed. It takes a little patience but it's worth it!
Line a baking sheet with parchment paper. Preheat the oven to 350° F.
Gently press the air out of the bun dough and turn out onto a clean work space. Divide the dough as follows:
6 large portions at about 50 grams each for the heads
12 small portions at about 8 grams each.
Take one one of the larger pieces, shape into a ball and flatten into a disk, place about a teaspoon or two of chocolate chips on top then bring up the edges around it to shape back into a ball. Make sure your edges are tightly sealed. Place seem side down the prepared baking sheet. Repeat with remaining large pieces of dough. Keep the dough covered with a damp towel while you work.
To make the ears, roll the small pieces of dough into logs. I found it easiest to flatten the pieces into rough rectangles then roll them up starting from one edge of the long side. Pinch the seam together then place seam side down.
Remove the topping from the refrigerator and divide into 8 pieces. You'll use 6 of them for the bunny faces, and the remaining 2 pieces to cover the ears.
For the faces, take one of the topping pieces, place between plastic wrap or wax paper and press down with the bottom of a measuring cup in to a flat disk, then wrap the disk around one of the buns. Create the diamond pattern by pressing the edge of a bench scraper or the dull side of a dinner knife into the dough. Don't cut all the way through. Refer to the video linked above. Repeat with the remaining 5 heads.
Divide the remaining 2 pieces into 12 smaller pieces. Flatten the pieces with your fingers into rectangles and press the X's into the topping. Place the topping onto each ear leaving a small amount on the lower portion of the ear uncovered so you can place it under the faces.
Flatten the uncovered portion of the ear a little, then tuck the ears them under the buns on the baking sheet. Cover and let them rest for 30 minutes.
Bake in preheated oven at 350° F for 15 min - 18 min, until an instant read thermometer reads 190° F.
Transfer to a cooling rack and decorate as desired with melted chocolate. (While the buns were still warm, I placed mini chocolate chips in place for the eyes and nose, then used a toothpick to gently push the warmed chocolate into the shapes you see below. I then added candy eyes on top while the chocolate was still warm.)
Topping recipe adapted from Pineapple Buns Recipe in the Bake From Scratch January 2020 issue.