Dutch Butter Cake
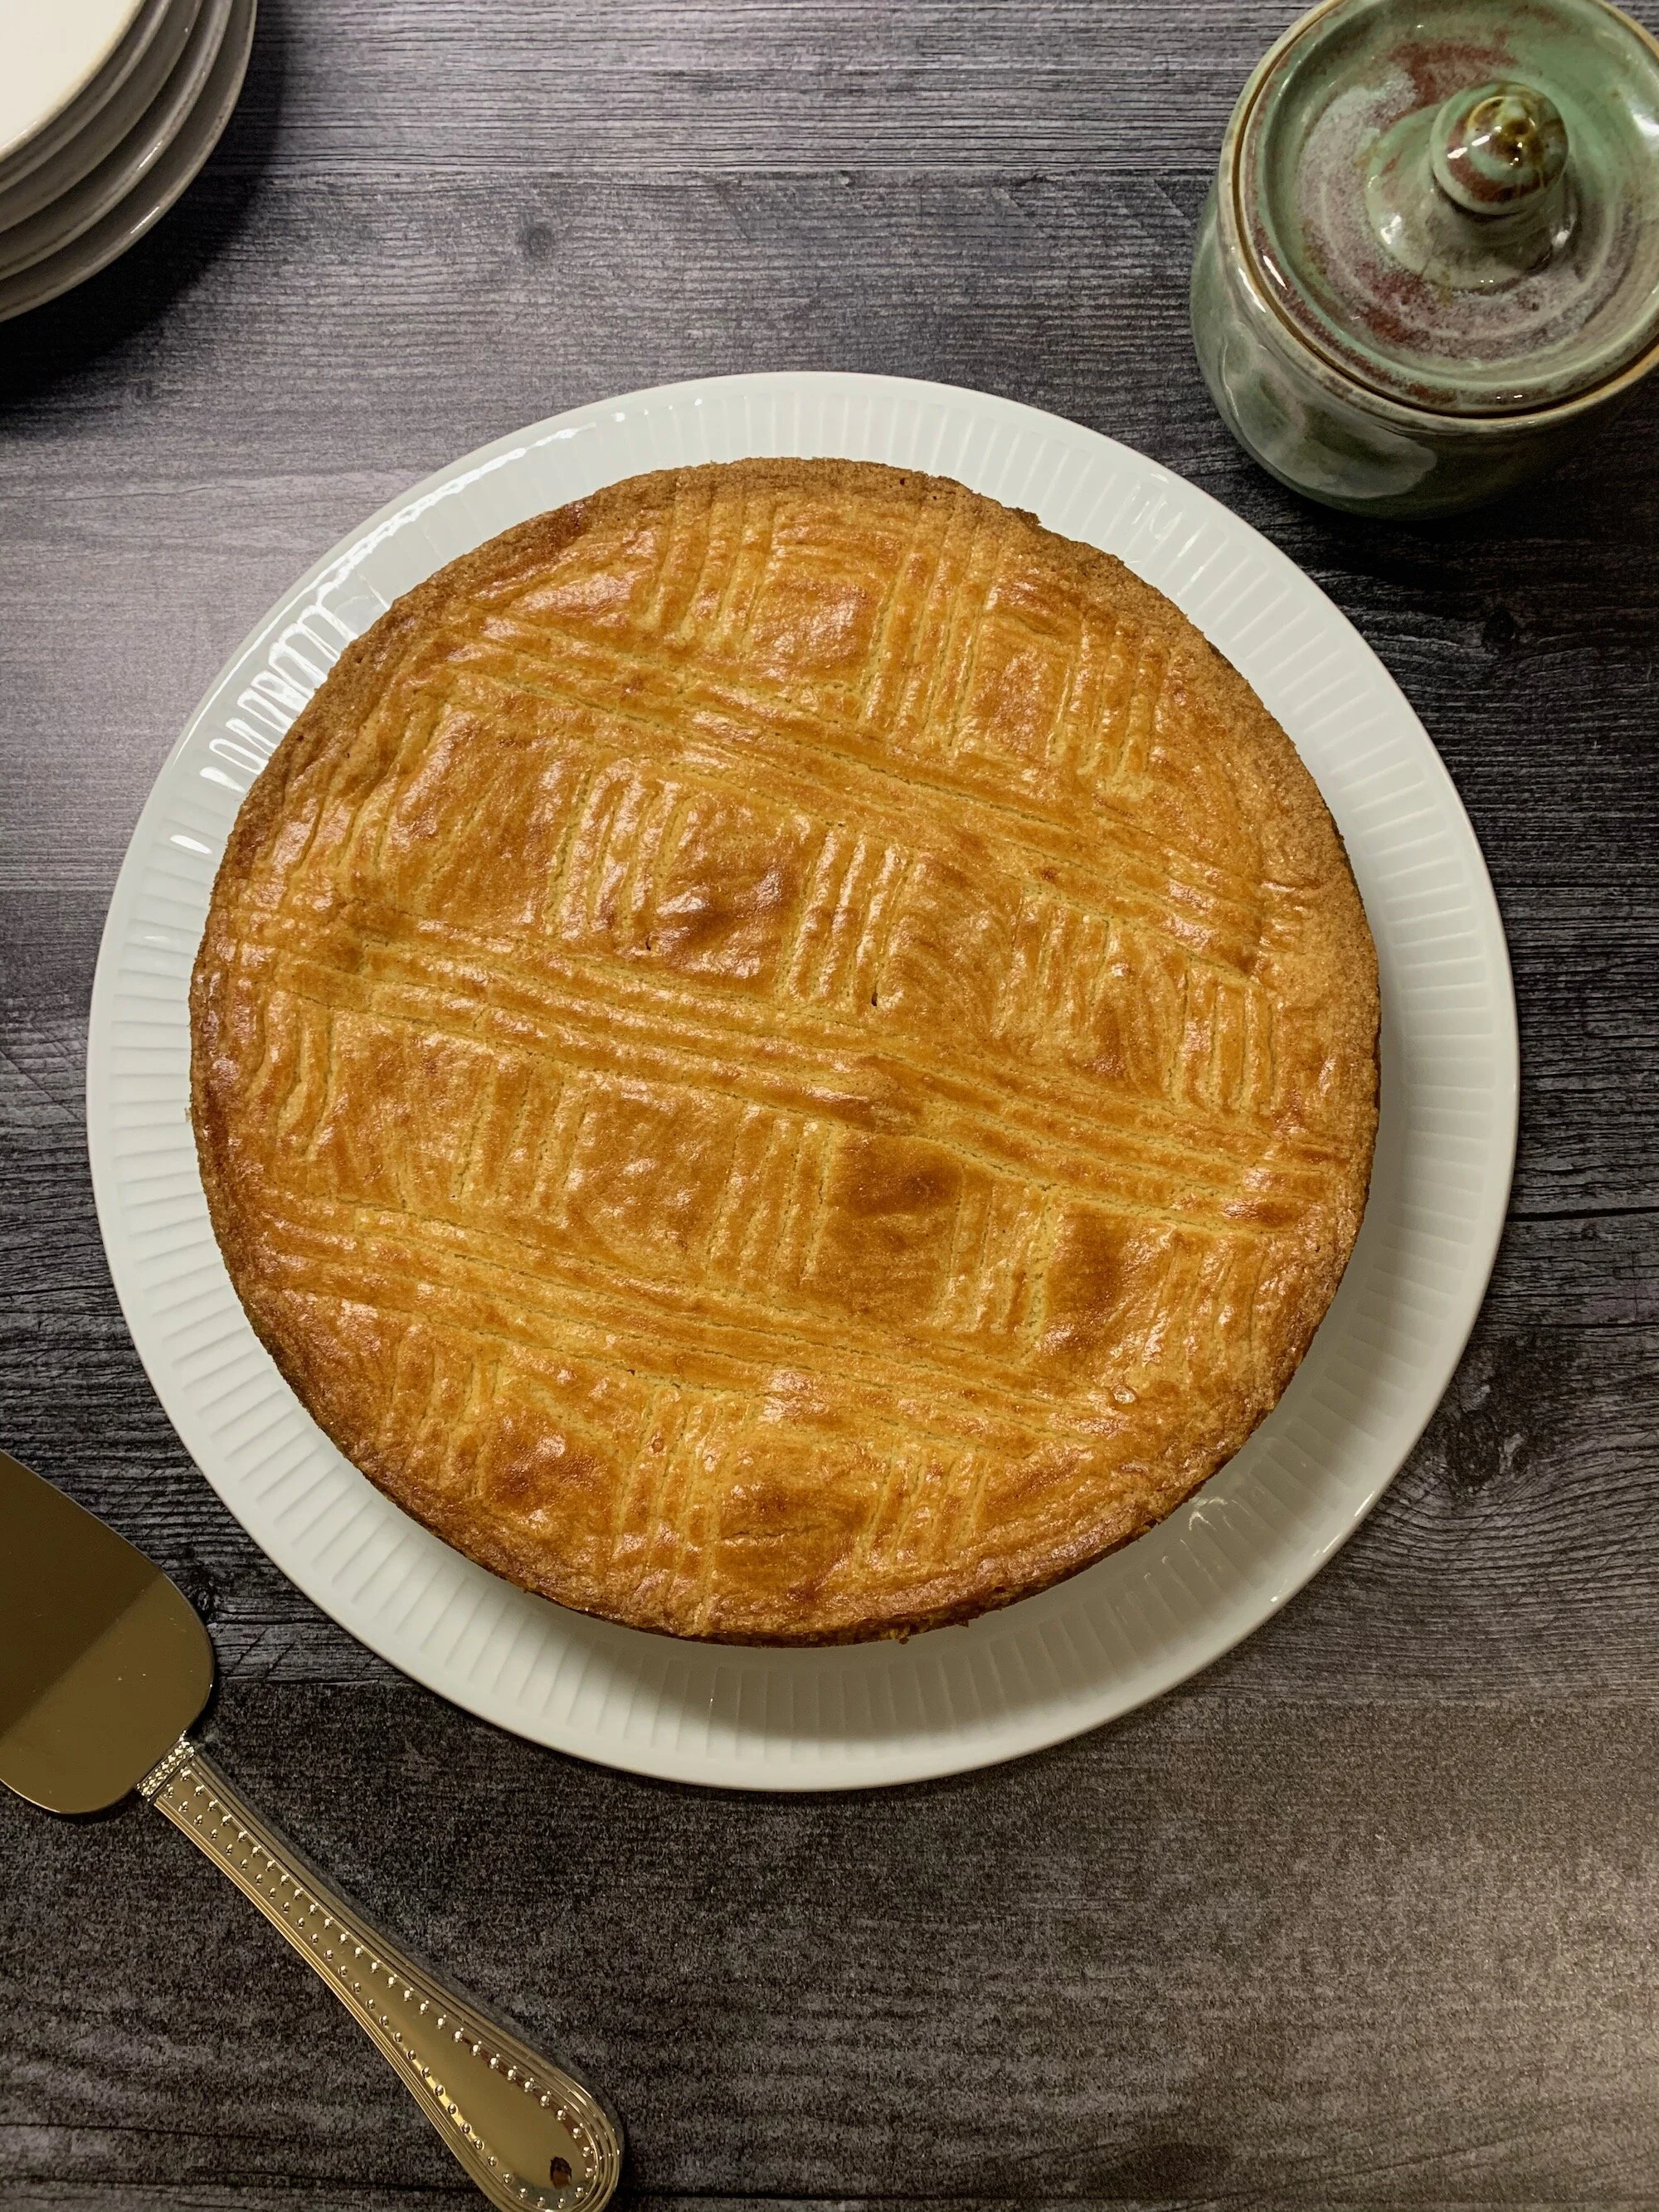
This decadent single layer Butter Cake (or Boterkoek) creates it’s own cookie-like crust thanks to a generous quantity of butter and sugar in the batter. With it’s butter-forward flavor, it feels like a relative of the shortbread cookie. You could definitely pick up a slice with your hands and take a bite, but it’s soft enough to eat with a fork and is a more luxurious experience to do so, letting each buttery bite melt in your mouth.
I was initially seduced into making it because of the photo that accompanied the recipe in the March/April 2020 edition of Bake from Scratch Magazine. The rustic yet beautiful design drew me in, and once I read the simple ingredient list and simple, stir-together method I knew I had to try it out. I’ve included a few photos below to help you in creating the design since the technique is not included in the magazine’s instructions.
Dutch Butter Cake Recipe:
https://www.bakefromscratch.com/dutch-butter-cake/
Difficulty:
Easy
Yield:
This recipe makes a single layer 9-inch cake but it’s so rich that it could easily serve 12. A thin slice is plenty...even though my husband’s only feedback was “Oh my god. I could eat the whole cake.”
Special equipment:
9-inch springform pan
A few tips:
Weigh out your salt. 1 tsp of my course ground kosher salt equals 6 grams, not the 3 grams they call for, and would have been too much if I’d simply dumped in a teaspoon.
If you don’t have easy access to cake flour, you can substitute all purpose flour by doing the following:
Measure out the 62 grams of all purpose flour in a small bowl (this is the amount of cake flour called for in the recipe)
Remove 1 TBSP
Add 1 TBSP of cornstarch to the bowl of flour and sift them together
The recipe calls for orange zest. I didn’t have oranges at home, so I added just under 1/4 tsp of cardamom since the spice has citrusy floral notes. I’m not necessarily suggesting it, but that’s what I did and it turned out delicious.
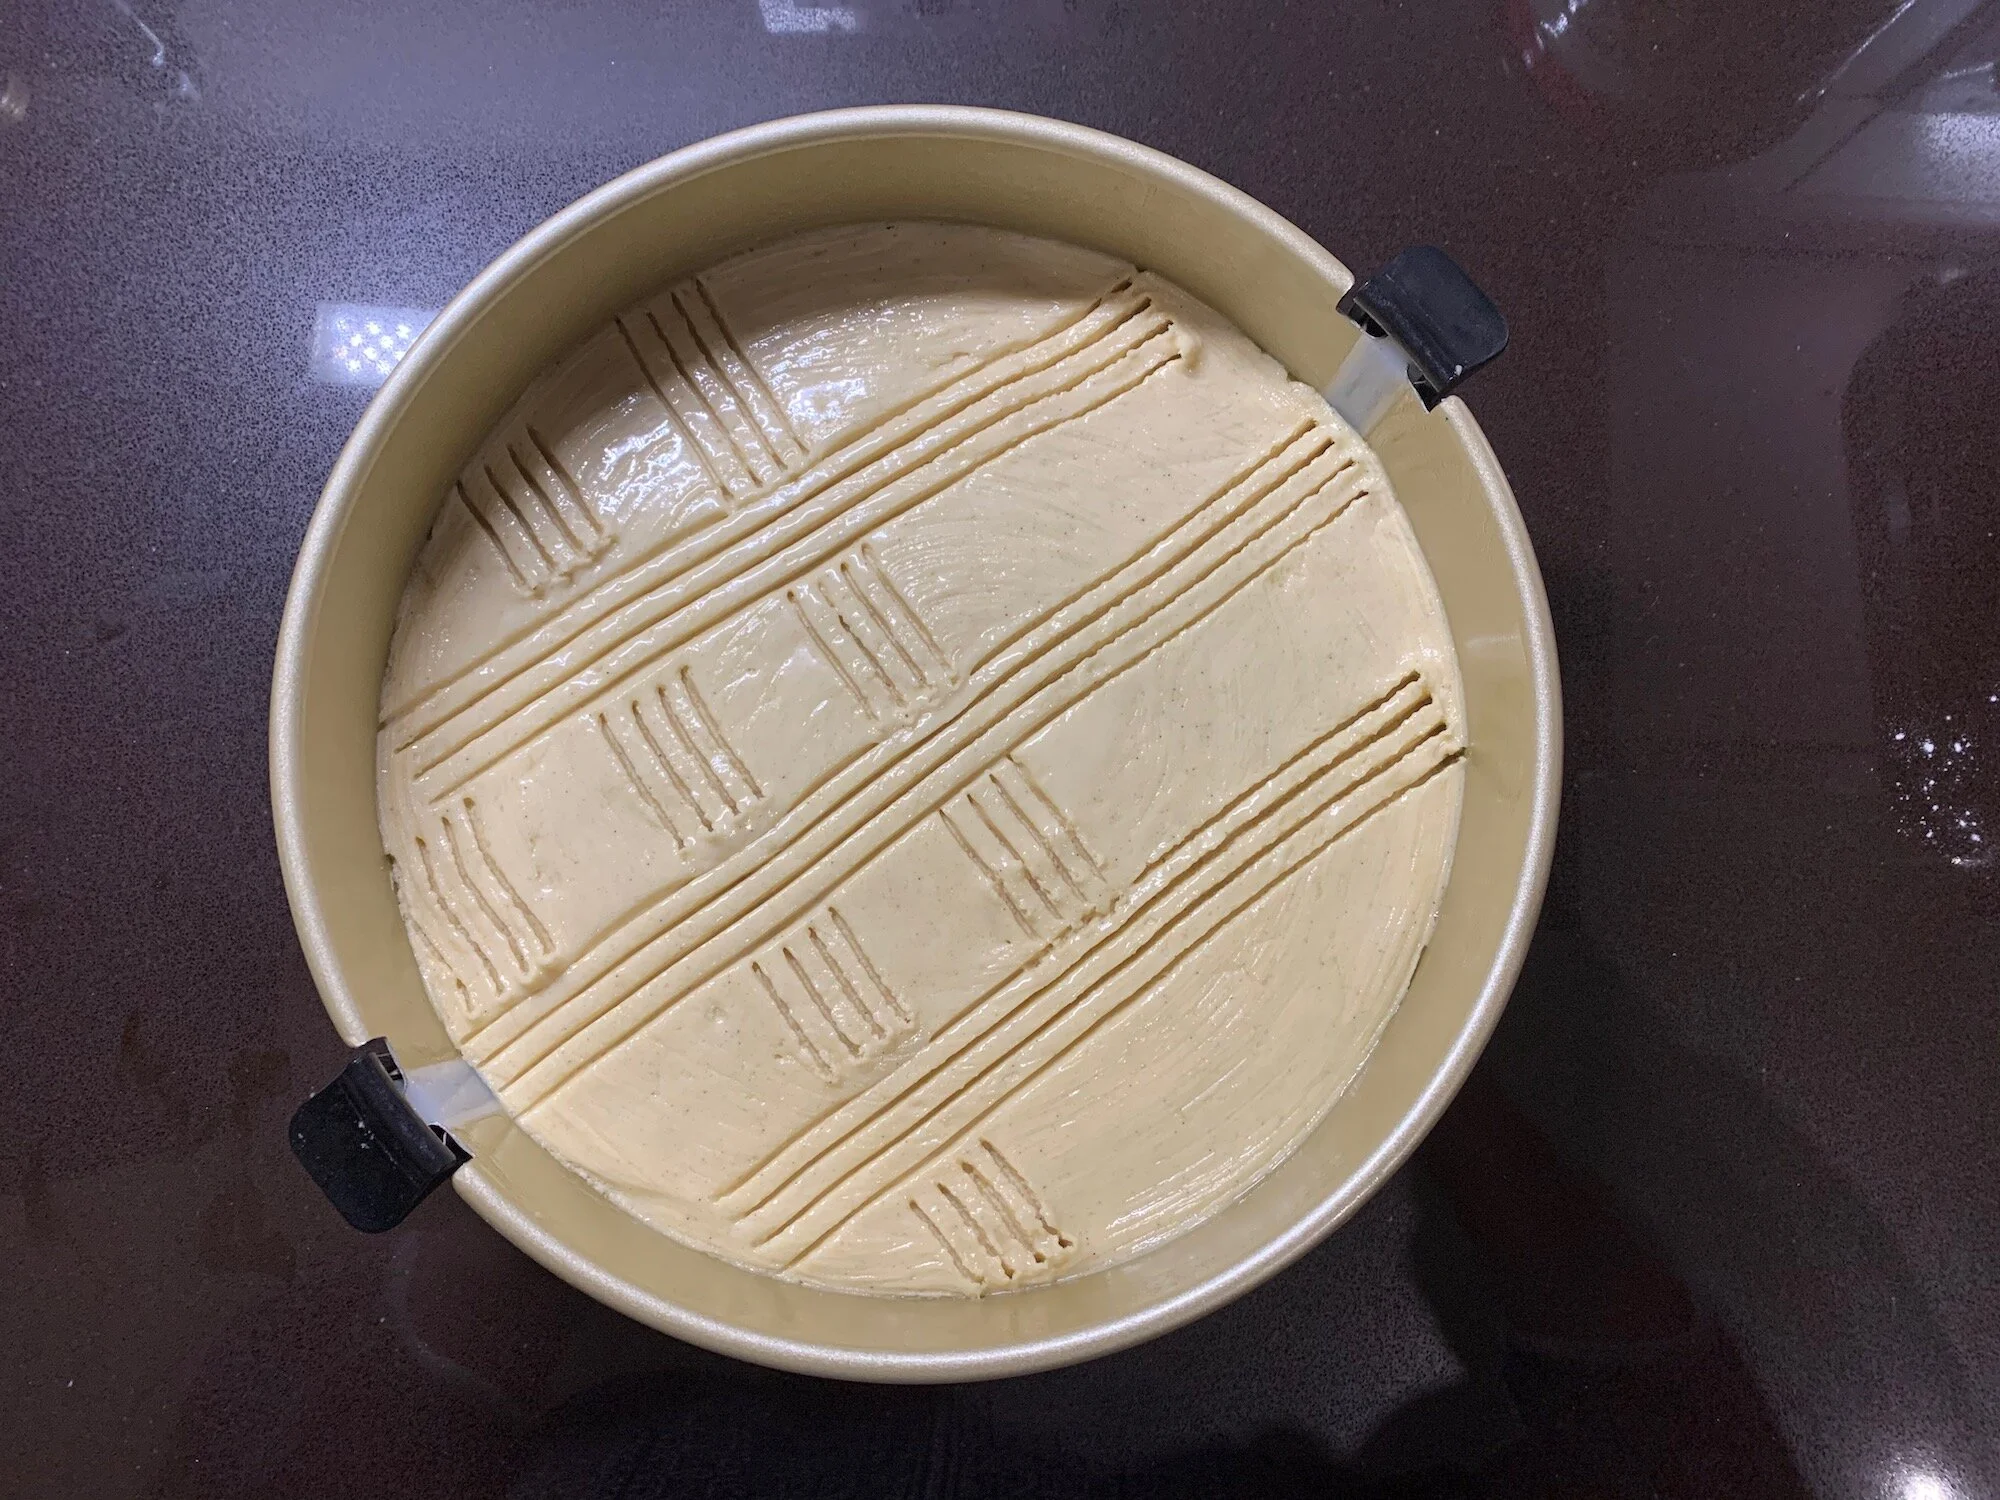
How to create the design in the top:
Spread the batter in the pan as evenly as possible with an offset spatula and clean off any that gets on the side of your pan with your fingers:
2. Smooth out the top by placing plastic wrap on the top of the batter and press down with your hands:
3. With a dinner fork, first draw 3 lines evenly spaced in one direction, wiping off your fork after each line. Try to go a little deep – around 1/4 inch – into the batter because they do fade a little when baking:
4. Make the cross hatch design by drawing lines in between, and perpendicular to the first set that you made.
Cross lines in progress.
Enjoy. I can’t wait to make this again when I need something simple yet impressive to share with friends.


