Black Cocoa Leopard Milk Bread
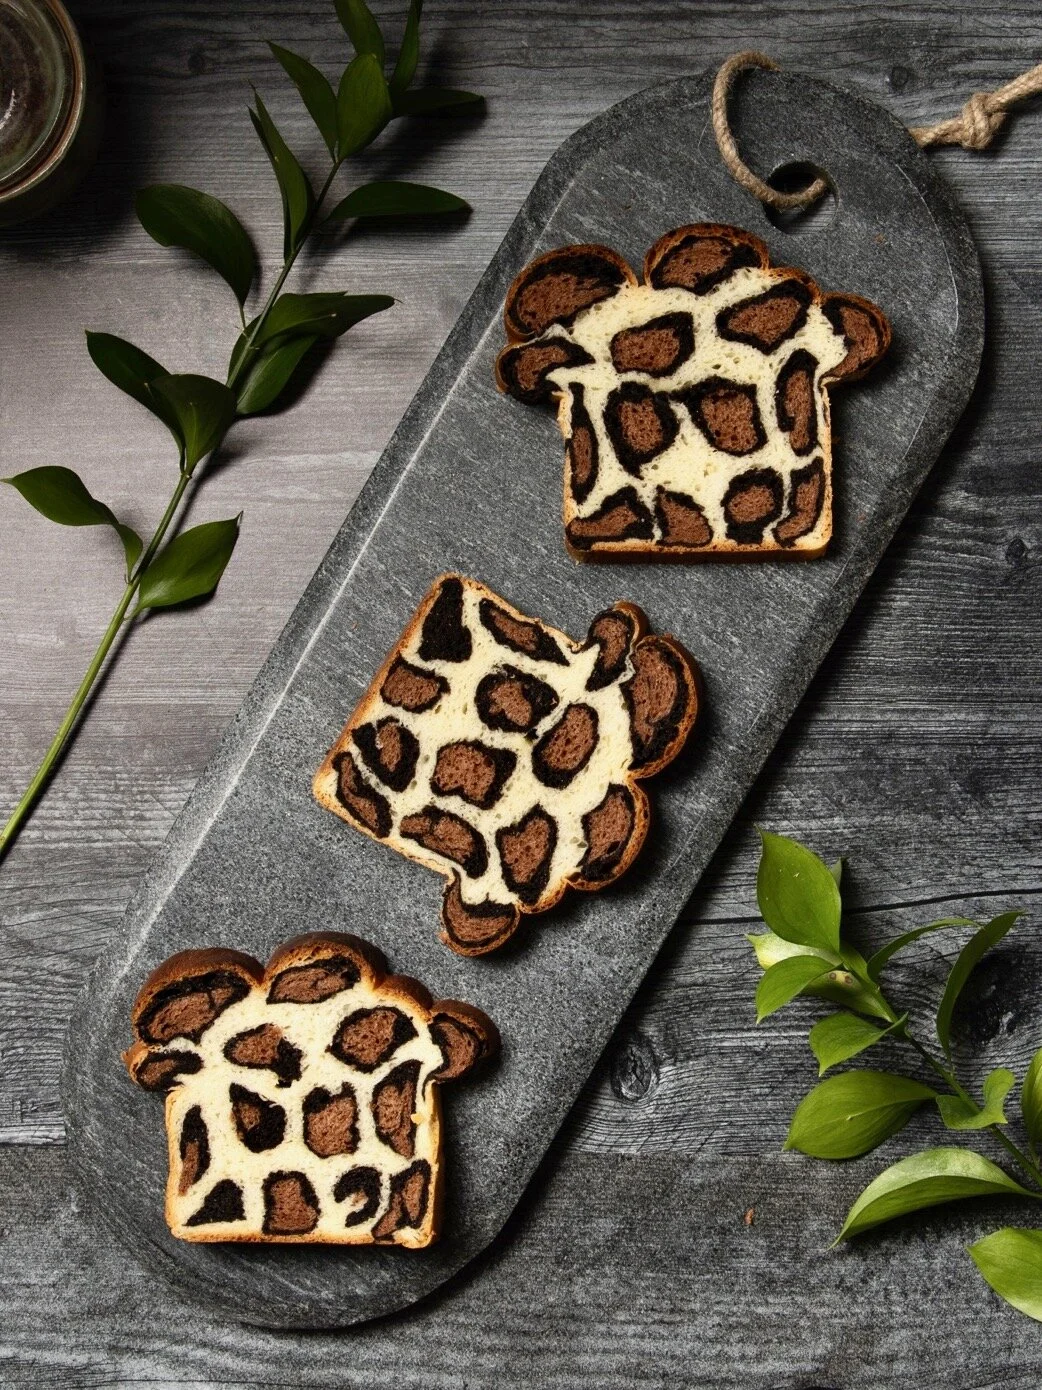
Isn’t this leopard print bread eye-catching? It's made from a simple milk bread recipe that has cocoa kneaded into the dough to create the leopard spots. The baked bread has a soft texture and a very light sweetness with subtle cocoa and orange flavors. I thought it made for a nice breakfast, spread with some cream cheese or marmalade, and would make an impressive display if you’re having guests over for brunch. If you think it would be fun to make, don’t be scared off by the elaborate design. The dough is easy to work with, and creating the leopard pattern is a fairly simple process to follow. (Scroll down for visuals.)
I’ve tried to do some research to see who came up with the Leopard Milk Bread idea. A lot of blogs give credit to chef Patricia Nascimento, but she credits Alter Gusto, a French blog, that in turn credits a Malaysian blog Nasi Lemak Lover. I guess this is always the way with recipes, right? They get passed from generation to generation and country to country, especially now, thanks to sites like Instagram and Pinterest. If you know who first came up with the Leopard Bread design, please send me a note, I’d love to know!
(As an Amazon Associate I earn from qualifying purchases made through this site.)
(Photo by Daniel Marks)
Recipe Recommendation:
I followed the recipe linked below from the Two Cups Flour recipe blog, and it came together quite nicely. I’ve added some notes and visuals below to add a little more detail if you decide to try it. I like this recipe because it relies on cocoa for the colors vs some other recipes that use food coloring. The only modification I made was to use Black Cocoa for the darkest color per the suggestion of another baker that I follow.
Just a few tips:
Here’s a link to a video that shows the rolling method. It’s not in English but the visuals were enough to help me along. She starts forming the loaf at 6:40 minutes into it: https://www.youtube.com/watch?v=hvUjru6Vbks
Your milk should be between 100-110°F to activate the yeast but not kill it.
The recipe says to kneed the dough in the bowl with the cocoa. I found this challenging. Once the cocoa has roughly worked itself into the dough, transfer it to a clean countertop and finish kneading there. So much easier! Then put back in the bowl and cover before you refrigerate.
I used a small scale rolling pin which made the rolling process go quickly. I plan to re-use it for dumplings, bao, small tarts, etc.
(Photo by Daniel Marks)
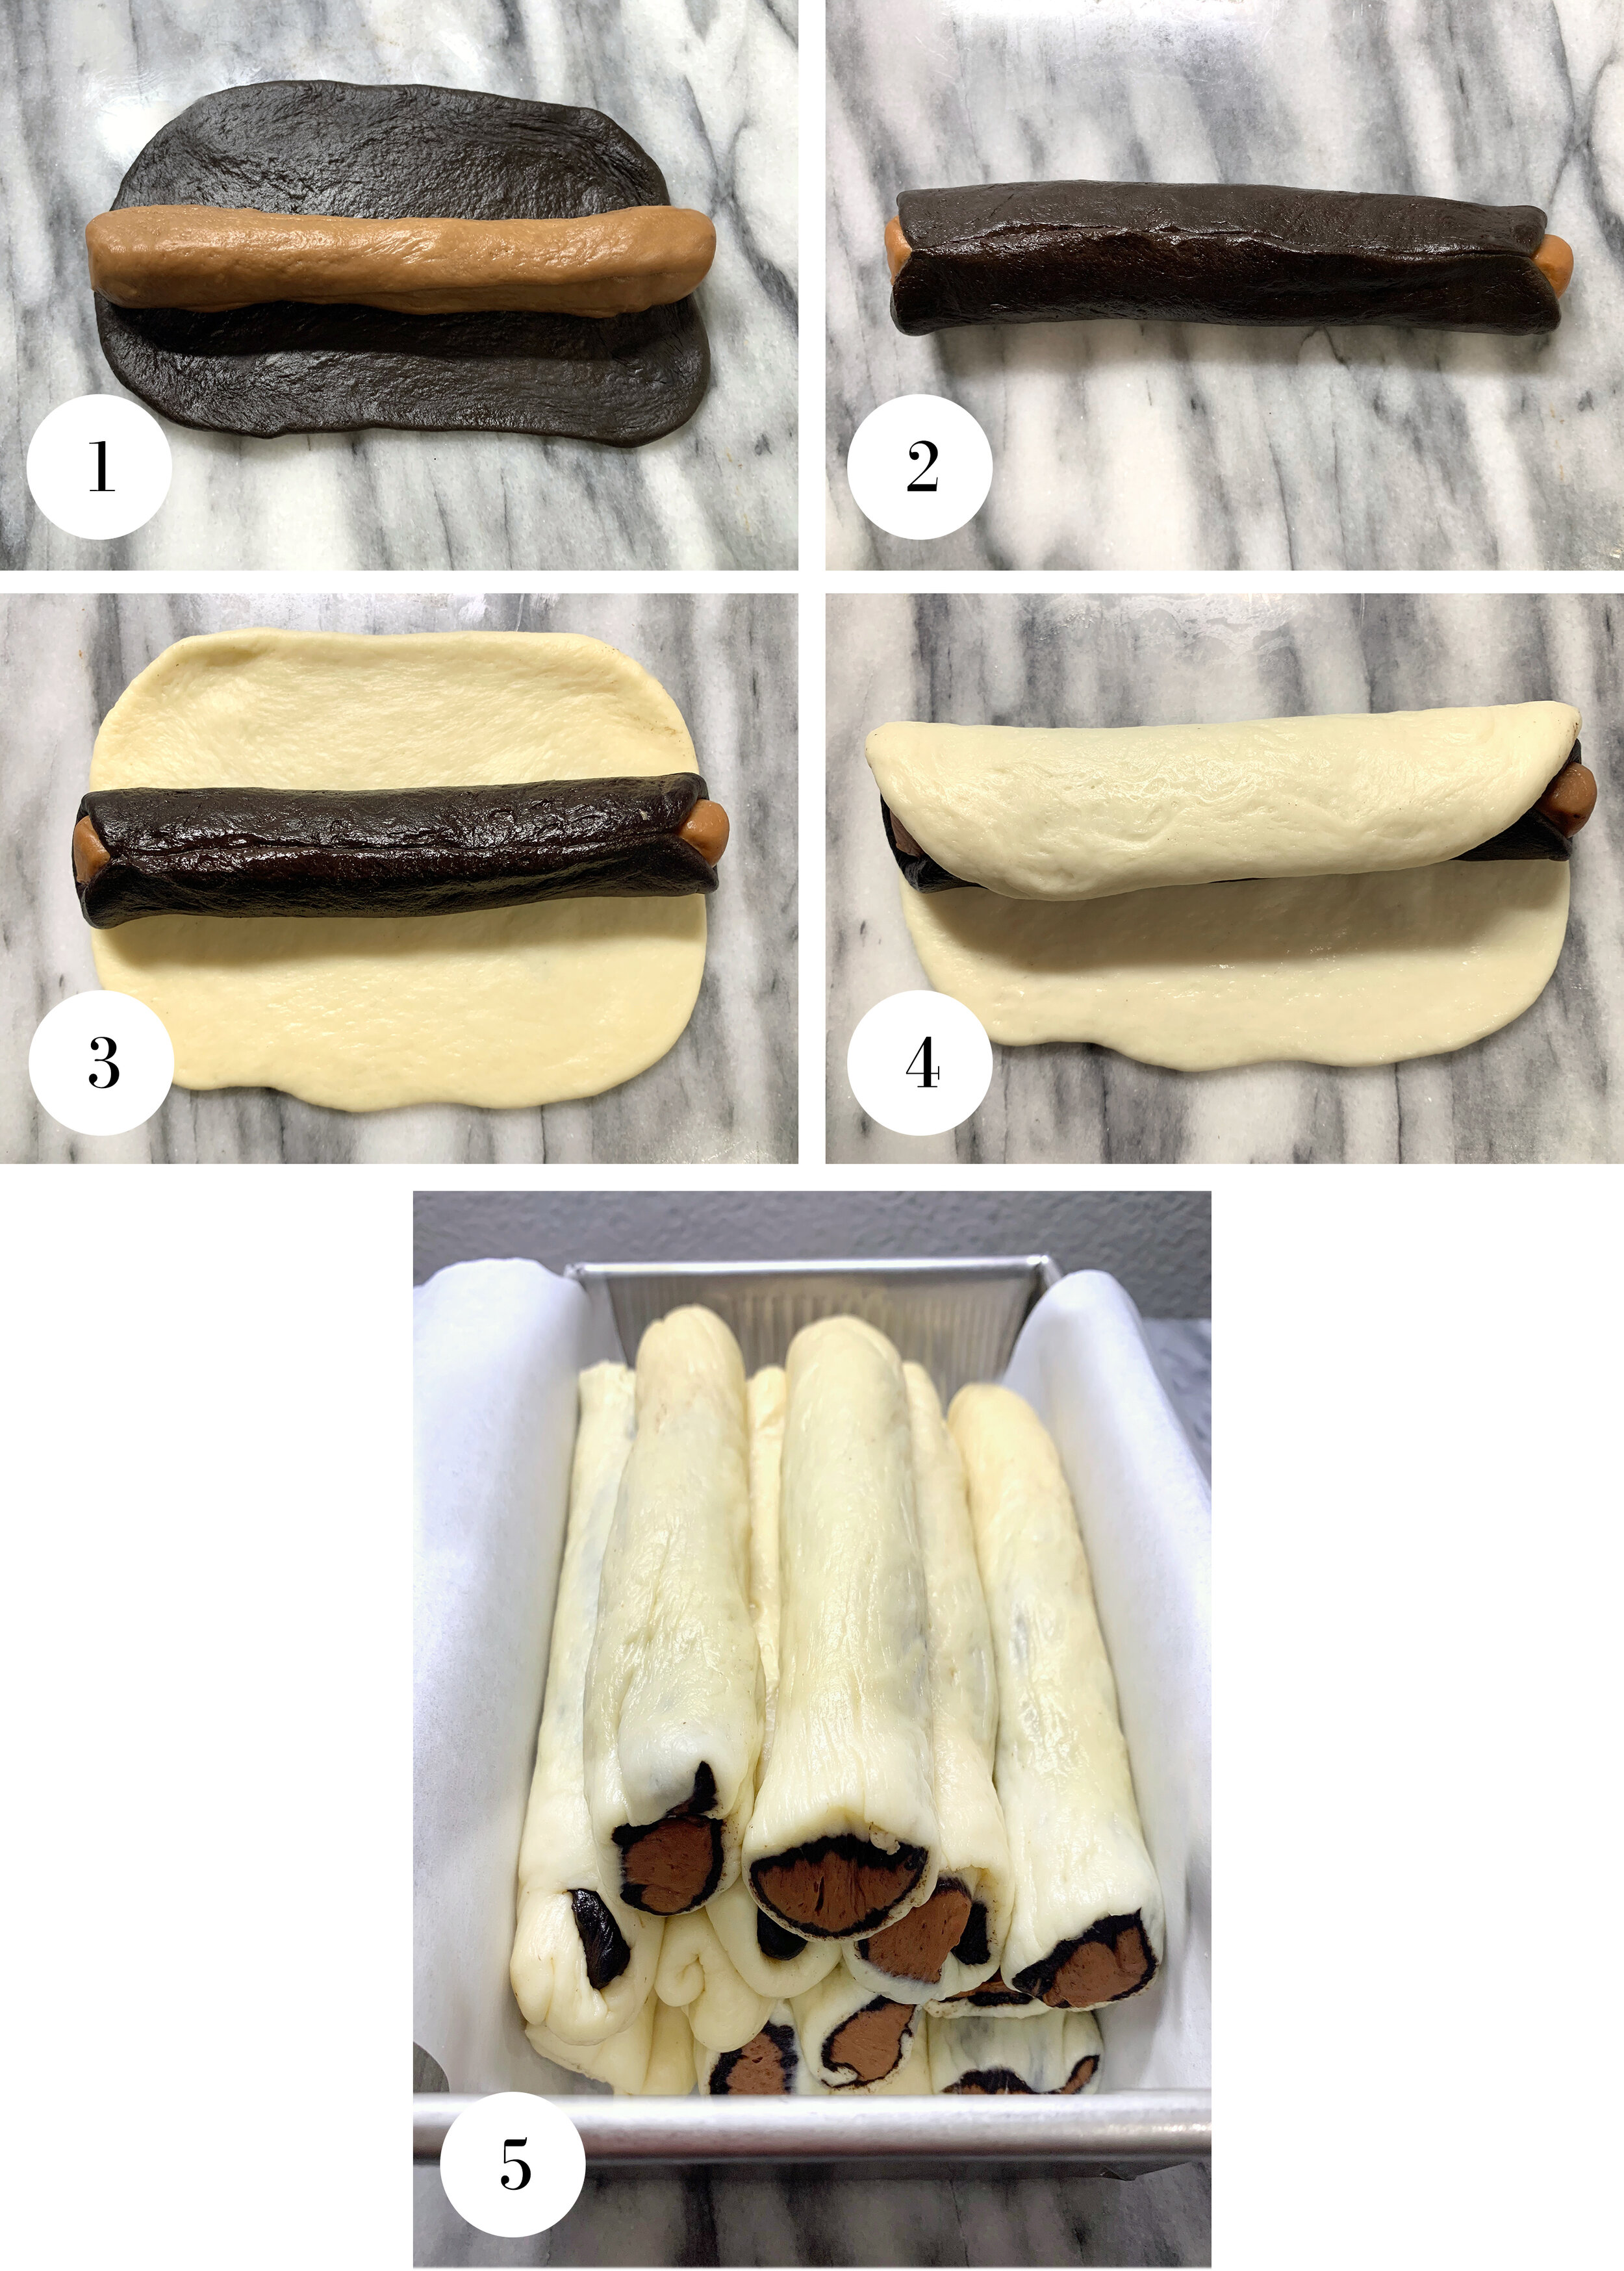
Some rough visuals of the process:
After making the dough, you’ll divide it up and create balls of colored dough:
7 balls of dough kneaded with lighter cocoa
7 balls of dough kneaded with darker cocoa, rolled out
7 balls of plain dough, rolled out
Next, you’ll create a set of 8-inch logs with the lighter cocoa color, wrap the logs in the other two colors as shown below, then stack all of them in a loaf pan. The final length of each log should end up around 3/4 inch shorter (lengthwise) than your baking pan to allow room for the final rise but not any shorter than that or it won’t fill up the pan when it bakes.
Not too complicated, right? I love rolling out pie and tart doughs. I find it kind of zen, so I enjoyed this process. Let me know if you try it!
(Photo by Daniel Marks)
(Photo by Daniel Marks)


